Jan 06, 2026

4 min read


Swapping out an app's name might seem simple on the surface, but in a React Native project, it touches just about everything. One wrong move with a display name or a package identifier, and you're suddenly staring down broken builds and a long night of debugging. This guide is your roadmap to getting it right the first time.
When you're working with a modern stack like Expo, TypeScript, and NativeWind—which is standard for our gluestack market templates—you learn quickly that everything is connected. A tiny mistake in app.json can cause a ripple effect, leading to build failures. Forgetting to update a native identifier can get your app rejected from the stores.
It really boils down to two key pieces:
bundleIdentifier for iOS and the package name for Android. Think of them as the app's permanent social security number, like com.wealthwise.app.Nailing this from the get-go is a massive time-saver. I've seen developers burn 4-6 hours trying to hunt down all the right files and fix build errors from a botched rename, mostly due to patchy documentation and weird platform quirks. Thankfully, tools like Expo have made this process much smoother, often taking it from a half-day headache to a task you can knock out in under 30 minutes. That's a huge win when you consider React Native already cuts development costs by 30-35% compared to building fully native apps.
To get through this without any hiccups, you need a clear map of the files you'll be editing. Each one has a specific job in defining your app's identity across platforms. This flow diagram gives you the basic sequence: start with your main config file, and let the changes trickle down to the native iOS and Android projects.
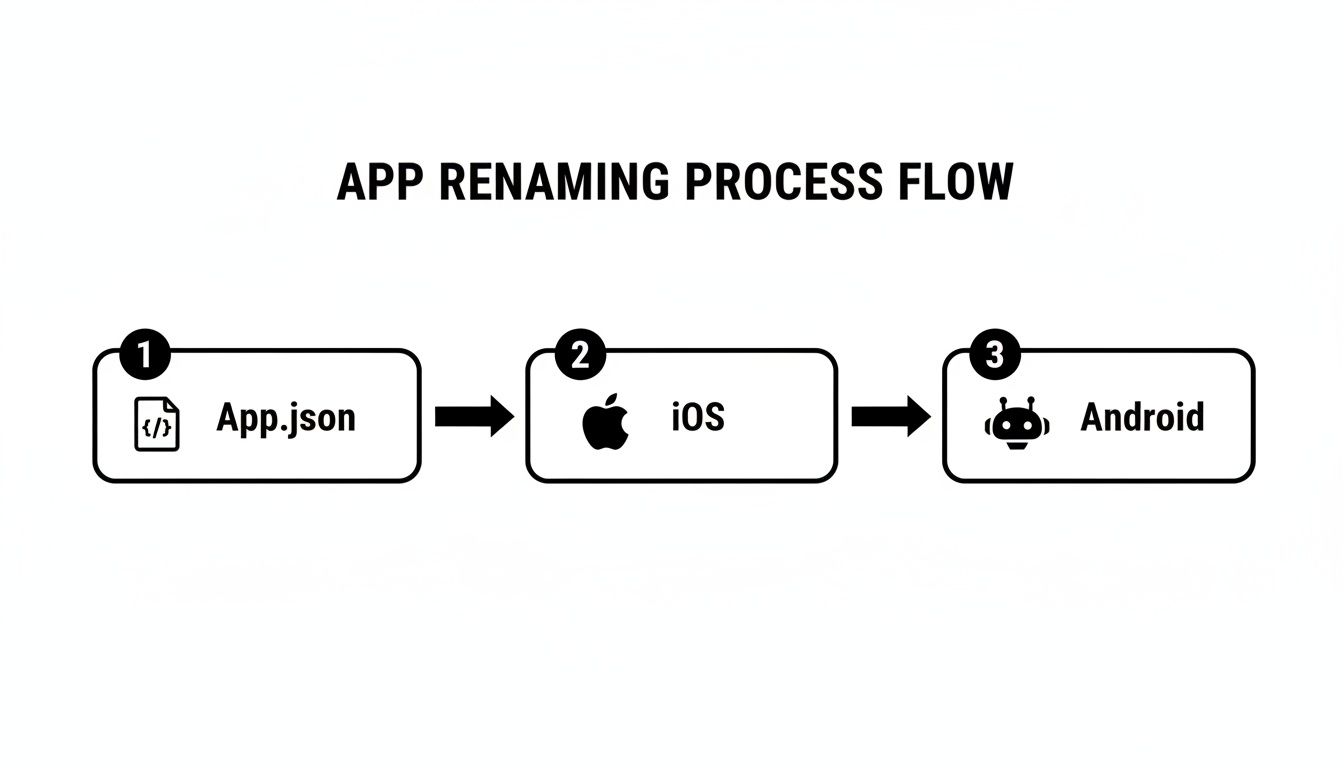
The key takeaway here is that app.json (or app.config.js) is your starting point. Its changes get pushed into the native iOS and Android projects when you run your build.
One of the most common mistakes I see is developers manually editing native files like
Info.plistorAndroidManifest.xmlbefore updatingapp.json. This almost always leads to your changes being overwritten during the next build. Always treatapp.jsonas the single source of truth and let Expo's tooling do the heavy lifting.
This guide will walk you through the whole process, step by step. Whether you're rebranding a project you've been working on for months or just customizing a new template, mastering this skill will set you up for a clean, professional, and error-free launch.
Here's a quick look at the essential files you'll be working with. Understanding what each one does will make the process much smoother.
| File or Location | What It Controls | Platform |
|---|---|---|
app.json or app.config.js |
The main configuration: display name, slug, bundle/package IDs | Both (Source of Truth) |
ios/[project-name]/Info.plist |
iOS display name (CFBundleDisplayName) and bundle identifier |
iOS |
android/app/build.gradle |
Android package name (applicationId) |
Android |
android/app/src/main/res/values/strings.xml |
Android display name (app_name) |
Android |
package.json |
Project metadata, mainly the name field for dependencies |
Both |
Getting familiar with this handful of files is the first step toward a successful and stress-free app rename.
app.jsonThe command center for any modern Expo project is its app.json or app.config.js file. When you're renaming your app, this is ground zero. Getting this right from the very beginning saves you from a world of headaches and overwritten changes down the line.
At its core, the process is simple: you just need to update two key properties, name and slug. It’s really important to understand that they do two completely different things. The name is what your users will actually see on their home screen. The slug, on the other hand, is the URL-friendly handle used in your app's public URL for Expo Go.
Think of it like this: if your app was a book, the name is the title printed on the cover. The slug is the unique ISBN on the back. They're both essential, but they serve different audiences and have different jobs.
Let's run through a quick, real-world scenario. Imagine you started your project with a template named 'FinanceTracker' and now you're ready to rebrand it as 'WealthWise'.
Here’s how you’d update your app.json:
{
"expo": {
"name": "WealthWise",
"slug": "wealthwise-app",
// ... other configurations
}
}
You can see what changed:
name: This is now "WealthWise," the polished, user-facing display name.slug: I've changed this to "wealthwise-app". My personal rule is to always keep the slug simple, lowercase, and free of special characters to avoid any weird issues.Making these tweaks in app.json is incredibly powerful because Expo treats this file as the single source of truth. When you kick off a build, Expo automatically pushes these values into the native iOS and Android config files, like Info.plist and AndroidManifest.xml. This alone saves you from having to manually dig through those files yourself.
A smooth name change really comes down to avoiding a few common mistakes. One of the biggest blunders I see is using special characters or spaces in the slug. That can easily break your deep linking and cause over-the-air (OTA) updates to fail because the URL just won't be valid.
Botched app name changes have been a major source of frustration for developers for years. In fact, simple configuration errors once caused an estimated 12% of Expo build failures in surveys among freelance developers, often delaying MVP launches by up to 48 hours. By centralizing this in app.json, Expo has slashed that inefficiency by over 90%. That’s a huge win in a market where React Native's developer adoption sits at a strong 14.51%, powering a massive part of the app economy. You can find more stats on the React Native developer ecosystem on Binmile.
My go-to rule for the
slugis to keep it squeaky clean: lowercase letters, numbers, and hyphens only. So, if your app name is 'My Awesome App 2.0', a safe slug would be something like 'my-awesome-app-2'. This simple habit prevents an entire category of bugs.
Once your app.json is updated, you’ve built a solid foundation for the rest of the renaming process. You can explore how to build on this by checking out our complete Expo and React Native tutorial. Nailing this first step ensures that as you move into platform-specific identifiers, your core configuration is locked in and totally reliable.

While the display name is what users see on their home screens, the app stores care about a much more permanent identity: the Bundle Identifier for iOS and the Package Name for Android.
Think of these as your app's permanent digital fingerprint. Once you publish to the App Store or Google Play, they are locked in. You can't change them.
This is a step you absolutely have to nail before your first release, especially when you're starting from a template that likely has placeholder identifiers. Mess this up, and you could be forced to unpublish your app and start over with a brand new store listing, kissing all your hard-earned ratings and user data goodbye.
Thankfully, Expo saves us from the headache of digging through native project files. You can manage these critical identifiers right from your app.json or app.config.js file using two specific keys: ios.bundleIdentifier and android.package.
The standard convention here is reverse domain name notation. So, if your company website is wealthwise.com and your app's slug is wealthwise-app, you'd set them up like this:
com.wealthwise.appcom.wealthwise.appKeeping them identical across both platforms is a solid best practice. It makes life so much easier when you're setting up third-party services like Firebase, push notifications, or in-app payments.
Here’s what that looks like inside your app.json:
{
"expo": {
"name": "WealthWise",
"slug": "wealthwise-app",
"ios": {
"bundleIdentifier": "com.wealthwise.wealthwise-app"
},
"android": {
"package": "com.wealthwise.wealthwise-app"
}
}
}
With this setup, every time Expo generates your native project files, it'll inject the correct identifiers automatically. Understanding these nuances is crucial, and if you want to go deeper, it's worth exploring the differences between React Native and native app development.
Once your app.json is updated, the next move is to apply those changes by regenerating the native ios and android directories. For this, we turn to the expo prebuild command. It’s a powerful tool that reads your configuration and builds the entire native project structure from the ground up.
To avoid any weird caching issues or leftover artifacts from the old configuration, always run it with the --clean flag. Pop open your terminal in the project root and run:
npx expo prebuild --clean
This command wipes your existing ios and android folders and rebuilds them based on your latest settings. It might take a minute, but it's a non-negotiable step for verification.
Don't skip the
--cleanflag. I've seen developers pull their hair out over old identifiers sticking around because of caching. A clean prebuild is your insurance policy—it guarantees every file is fresh and based on your new config.
After the prebuild finishes, it's time to play detective and confirm the changes were applied correctly. This is your last chance to spot-check everything before you commit your code or kick off a build.
Here’s where you need to look:
For iOS: Open up ios/[YourProjectName]/Info.plist. You can use a text editor or just open the ios folder in Xcode. Find the CFBundleIdentifier key. Its value should be an exact match for what you put in ios.bundleIdentifier.
For Android: Crack open the android/app/build.gradle file. You’re looking for the applicationId inside the defaultConfig block. Make sure its value matches your android.package setting.
Verifying these files yourself provides that final peace of mind. You know for sure that your app’s core identity is correctly wired up, preventing those dreaded, last-minute build rejections from the app stores.
Your app’s new identity has to go beyond the code. A successful rebrand means making sure your new name is front and center on your web presence and in the app stores where users first discover you.
I’ve seen it happen more times than I can count: a team executes a flawless rebrand in the code, only to launch with the old name lingering in a browser tab or, worse, on the actual App Store listing. It’s a small detail that can make a polished app feel unprofessional and confuse potential users right out of the gate.
If you're building a universal app with Expo, your web build deserves the same attention as your native ones. The browser tab title is often the very first thing a user sees. Luckily, you can manage this right inside your app.json.
Just pop a web key into the expo object and set the title. This simple move ensures the <title> tag in your generated HTML is always on-brand.
{ "expo": { "name": "WealthWise", "slug": "wealthwise-app", "web": { "title": "WealthWise - Your Personal Finance Tracker" } // ... other configurations } }
This little tweak doesn't just clean up the browser tab. It also affects how your app looks in search results and when it’s shared on social media, making it a tiny but mighty detail for brand consistency.
A huge part of understanding how to change application name is recognizing that it's your first marketing tool. Your app store listing drives 74% of top App Store downloads for hybrid apps. In the past, I've seen A/B tests where mismatched names led to 15-20% higher bounce rates simply due to user confusion. Thankfully, modern tooling has cut these kinds of renaming errors by an impressive 85%, making it easier to maintain that crucial brand consistency from day one. You can dig into more insights on the impact of branding in hybrid apps on Springsapps.
With your code ready to go, the final frontier is the app stores themselves. Both App Store Connect and the Google Play Console have their own metadata fields that you have to update manually. This part is completely separate from your codebase.
Here’s your checklist for each platform:
name you set in app.json.Updating these fields is easy but absolutely essential. On App Store Connect, you’ll roll these changes into a new app version for review. On the Google Play Console, you can usually update your store listing anytime, and the changes often appear within a few hours.
A cohesive name across every touchpoint—from the device home screen to the browser tab to the store listing—is what builds trust and drives downloads. It’s the final polish that separates a good app launch from a great one.
To help you keep track of everything, I've put together a quick checklist. Running through this before you ship will help you catch any lingering instances of the old name and ensure your new brand is represented perfectly everywhere.
| Location | Key Field to Update | Purpose |
|---|---|---|
app.json / app.config.js |
name |
Sets the display name on the user's device. The primary source of truth. |
app.json / app.config.js |
slug |
Defines the URL-friendly name for your app on Expo's services. |
app.json / app.config.js |
expo.web.title |
Sets the HTML <title> for your web build, visible in browser tabs. |
| iOS Native Files | Info.plist |
Contains the CFBundleDisplayName and CFBundleName for the native iOS build. |
| Android Native Files | strings.xml |
Holds the app_name string resource used by the Android build. |
build.gradle (Android) |
applicationId |
The unique package name for your app on the Google Play Store. |
project.pbxproj (iOS) |
PRODUCT_BUNDLE_IDENTIFIER |
The unique bundle ID for your app on the Apple App Store. |
| App Store Connect | App Name & Subtitle | The public-facing name and tagline on the Apple App Store. |
| Google Play Console | App Name & Short Description | The public-facing name and tagline on the Google Play Store. |
Nailing the consistency across these key spots is what gives your app a professional, trustworthy feel. It’s the difference between an app that feels thrown together and one that feels thoughtfully crafted from top to bottom.

You’ve painstakingly updated every config file and lined up your store listings. Now for the moment of truth: verification. Skipping this part is a one-way ticket to the classic "it works on my machine" nightmare, where caching gremlins and identifier mismatches only show up after you’ve shipped to users.
Thorough testing isn't just a suggestion; it's the final quality gate. This is how you confirm your rebranding effort is a solid success, not a ticking time bomb of bugs and broken builds. It’s all about making sure the new name and identifiers have actually stuck everywhere they need to.
Your number one enemy after a name change? Caching. Build tools, simulators, and even your package manager can stubbornly cling to old artifacts, making you think your changes failed. The only way forward is to start with a completely clean slate.
Before you even think about building, run through this decontamination protocol:
npm cache clean --force or yarn cache clean. This stops old dependencies from sneaking back in.npx expo prebuild --clean is your best friend. It nukes the ios and android folders and rebuilds them from scratch based on your app.json—the single source of truth.Following these steps ensures that your next build is truly fresh, using only the new configuration.
I can't count the number of hours I've lost debugging an issue that was just a stale value in a cached build folder. Make this cleanup process a reflex. It will save you an unbelievable amount of frustration down the line.
With a clean environment, you're ready to build and verify. Go ahead and run npx expo run:ios or npx expo run:android to compile the app and fire it up on your device.
Even with the best preparation, you might hit a few speed bumps. Knowing what to look for can turn a moment of panic into a quick fix. If your app builds successfully but still shows the old name somewhere, it's almost guaranteed to be a caching issue you missed. Go back and be ruthless with your cleanup.
What if the build fails completely? Your terminal is now your treasure map. The error messages will point you in the right direction. Most build failures after a rename trace back to an identifier mismatch. Dig into the native build logs—they’ll often tell you exactly which file is still referencing the old package or bundle ID.
A sneakier problem is broken deep links. If your app used a custom URL scheme tied to the old name or identifier (my-old-app://), those links will now fail silently. You have to manually test every single deep link path to make sure they still navigate to the right screen in your rebranded app.
Looking to level up your debugging game? Our guide on how to debug React Native apps is a great place to start, covering everything from inspecting native logs to using more powerful tools.
Once the app boots up, it's time for one last visual and functional check. This is your final opportunity to catch any lingering ghosts of the old name before you ship.
Getting through this verification process means you’ve done more than just learn how to change application name. You’ve mastered the full lifecycle of a fundamental development task. This systematic approach ensures your app not only works perfectly but also presents a polished, consistent brand to your users from the very first install.

Let's be real: manually renaming a project is a drag. It’s a huge bottleneck, especially if you're juggling multiple apps or white-labeling a template for different clients. This kind of repetitive grunt work is the perfect candidate for automation.
Why spend hours poking around in config files when you could just run a single, repeatable command? The key is to get comfortable with scripting. With a custom script, you can programmatically tweak JSON files, update native configs, and even swap out assets like splash screens from one central place. This is how you really unlock the power of using a template.
A great place to start is with a trusted community package. One of the most popular tools out there is react-native-rename. It’s a solid choice, but you have to be a bit careful when using it in an Expo-managed project because it directly messes with native files that Expo usually handles for you.
To use it safely, I stick to this workflow:
npx expo prebuild first. This command makes sure your ios and android directories are generated and ready to be modified.npx react-native-rename "NewAppName" -b com.company.newappname.Info.plist, build.gradle, and strings.xml to make sure the updates went through correctly.This approach handles the most tedious parts of the job, but it’s on you to double-check its work.
My personal rule is to treat automation tools as assistants, not replacements. They handle 80% of the repetitive work, but I always perform a final manual audit. This simple check has saved me from committing broken native files more times than I can count.
For total control, particularly in a white-labeling setup, nothing beats writing your own script. Picture a simple Node.js script that pulls from a config.json file. This file could hold everything: the new app name, bundle ID, and even the file paths to client-specific logos and splash screens.
From there, your script could automatically:
app.json with the new name, slug, and identifiers.strings.xml.Suddenly, figuring out how to change application name transforms from a manual checklist into a slick, error-proof part of your workflow. You’ll have a reliable system that lets you launch customized apps for clients faster than you ever thought possible.
Even with a step-by-step guide, renaming an app can throw a few curveballs your way. Let's tackle some of the most common questions and tricky situations that developers run into during this process.
Yes and no. It really depends on what you mean by "name."
The display name—the one your users see on their home screen—is totally flexible. You can update it anytime by simply submitting a new version of your app to the App Store and Google Play. It’s a common way to refresh your brand or clarify your app's purpose.
The real point of no return is the core identifiers: the iOS Bundle Identifier and the Android Package Name. These are set in stone the moment you publish. Think of them as your app's permanent social security number. If you try to change them later, the app stores will see it as a completely new application. You’d have to unpublish your current app and start from scratch, losing every single user, rating, and review you've earned.
Finalizing your bundle and package identifiers before your first release is non-negotiable. Treat them like a foundation; once the house is built, you can’t change it without tearing everything down and starting over.
This is a classic headache, and the culprit is almost always caching. To make your development process faster, various tools—from the simulator to your package manager—hold onto old build artifacts. When you rename things, these stale bits can get stuck, causing the old name to pop up like a ghost in the machine.
When this happens, you need to do a full, deep clean:
npx expo prebuild --clean. This wipes the old ios and android directories.npm cache clean --force or yarn cache clean.After that, a fresh build should pull in all the new configurations, and the old name will finally be gone for good.
Absolutely. This is a critical step that’s easy to miss, and it can silently break key features of your app.
Many third-party SDKs for services like analytics, push notifications, or crash reporting are tied directly to your app's unique identifiers. Firebase, for instance, uses your Android Package Name and iOS Bundle Identifier to link your mobile app to the correct project in their cloud.
If you change those identifiers in your app.json or app.config.js, you have to sync those changes with Firebase. That means you'll need to:
google-services.json (for Android) and GoogleService-Info.plist (for iOS) files.Forgetting to do this will sever the connection between your app and the service, causing things to fail without any obvious errors. It's a good practice to audit all your integrated services anytime you make a change to your app's core identifiers.
Ready to build your next app without the boilerplate? gluestack market offers a huge collection of production-ready React Native templates to help you launch faster. Check out our templates and UI kits today!

Feb 23, 2026
4 min read
Discover powerful mobile app monetization strategies to boost your revenue. Our guide covers IAPs, ads, and subscriptions for React Native apps and beyond.

Feb 22, 2026
4 min read
A clear guide to app development cost estimation. Learn what drives costs, see budget examples, and discover strategies to build your app for less.

Feb 21, 2026
4 min read
Discover how to promote mobile application effectively with proven ASO, paid campaigns, and retention strategies.

Feb 15, 2026
4 min read
Discover how to create a prototype of a website with a practical, step-by-step guide. Explore tools, testing methods, and tips to bring your idea to life.

Feb 14, 2026
4 min read
Confused about mockups vs wireframes? Learn the key differences, when to use each, and how to streamline your React Native app development workflow.

Feb 13, 2026
4 min read
Discover how mobile apps templates accelerate development. Learn to choose, customize, and deploy high-quality React Native templates for your next project.

Feb 12, 2026
4 min read
Explore mobile application interface design with practical tips, core principles, and platform-aware workflows to craft apps users love.

Feb 10, 2026
4 min read
Learn mobile first design principles to craft fast, accessible apps that delight users. Practical tips, examples, and testing strategies.

Feb 08, 2026
4 min read
Explore the progressive web app vs native debate with our in-depth guide. We compare performance, cost, and UX to help you make the right strategic choice.

Feb 07, 2026
4 min read
Discover how React Native templates can accelerate your app development. This guide explores choosing, customizing, and deploying templates for faster launches.

Feb 05, 2026
4 min read
Discover the key differences between expo vs react native, including workflow, builds, and performance to help you pick the right path for your app.

Feb 03, 2026
4 min read
Master image with text overlay in React Native with responsive, accessible patterns. Learn expo setup, NativeWind styling, and gluestack-ui examples.

Feb 03, 2026
4 min read
Discover cross platform app development with proven strategies to build faster for iOS, Android, and the web using a single, unified codebase.

Feb 01, 2026
4 min read
Learn how to make an app for my business quickly with template-based steps from planning to launch, plus tips to scale and optimize.

Jan 31, 2026
4 min read
Ready to build an app? This guide shares practical strategies for validating your idea, choosing a tech stack, and navigating the App Store launch.

Jan 30, 2026
4 min read
Master responsive design for mobile apps with this guide on fluid layouts, breakpoints, and React Native. Build UIs that adapt perfectly to any screen.

Jan 25, 2026
4 min read
Learn how to design an Android app that stands out. This guide covers UX research, wireframing, Material Design, and the developer handoff process.

Jan 24, 2026
4 min read
Explore ui design web essentials: a complete guide to principles, responsive patterns, and workflows for intuitive, engaging web interfaces.

Jan 23, 2026
4 min read
Discover 10 essential mobile app design best practices for building exceptional cross-platform apps. Actionable tips for UI, UX, navigation, and performance.

Jan 21, 2026
4 min read
Discover how to debug React Native apps effectively. This guide covers Flipper, React DevTools, and native code troubleshooting for faster development cycles.

Jan 20, 2026
4 min read
Learn how to create app for your business with a practical, modern approach. Plan, customize, and launch with proven steps.

Jan 19, 2026
4 min read
A complete guide to mobile app development for startups. Learn how to validate your idea, build an MVP, and launch a successful app faster and more affordably.

Jan 18, 2026
4 min read
Discover how to choose the right React website template to accelerate your project. Our guide covers everything from quality checklists to deployment.

Jan 17, 2026
4 min read
Discover how to choose, customize, and deploy a React Native app template. This guide provides practical steps for launching production-ready apps faster.

Jan 16, 2026
4 min read
Discover how mobile application templates accelerate development. This guide covers how to choose, customize, and launch your app with the right foundation.

Jan 13, 2026
4 min read
Start your journey in mobile app development for beginners. This guide breaks down how to build your first cross-platform app with React Native and Expo.

Jan 12, 2026
4 min read
Explore the best react native ui libraries and compare features, performance, and ease of use to pick the right toolkit for your app.

Jan 11, 2026
4 min read
Launch your own ride-hailing service with our guide to building a production-ready Uber app clone. Learn MVP strategy, tech stacks, and backend integration.

Jan 10, 2026
4 min read
Master modern cash app design with this guide. Learn the UI/UX, security, and React Native strategies needed to build a fintech app that users trust and love.

Jan 09, 2026
4 min read
Learn how to build a personal finance dashboard with React Native. A practical guide for developers on UI design, data architecture, and production readiness.

Jan 08, 2026
4 min read
A practical guide to building a cross-platform event check in app with React Native. Learn to implement QR scanning, offline sync, and deployment.

Jan 07, 2026
4 min read
Master linear gradient React Native components with our complete guide. Learn practical techniques for Expo, bare RN, and NativeWind to build stunning UIs.

Jan 05, 2026
4 min read
Discover how to monetize mobile apps with our founder's guide. Learn proven React Native strategies for ads, IAPs, and subscriptions to maximize your revenue.

Jan 04, 2026
4 min read
A practical guide on how to create a website app with a single codebase. Learn to build for web, iOS, and Android using React Native, Expo, and TypeScript.

Jan 03, 2026
4 min read
Learn how to create an app for your business with this definitive guide. Discover practical strategies for validation, development, and launch that work.

Jan 02, 2026
4 min read
Learn how to create a wireframe for a website with this practical guide. Move from initial sketches to developer-ready designs that get built right.

Jan 01, 2026
4 min read
Deciding on progressive web application vs native? This guide offers a deep comparison of performance, cost, UX, and use cases to help you choose wisely.

Dec 31, 2025
4 min read
Discover 10 mobile app security best practices for React Native. Learn to secure data, APIs, and code with actionable tips and examples for 2025.

Dec 30, 2025
4 min read
Unlock the real React Native app development cost. Our guide breaks down pricing by feature, team, and complexity to help you budget with confidence.

Dec 29, 2025
4 min read
A practical guide to master your React Native debug workflow. Learn to use Flipper, React DevTools, and Hermes to solve bugs in Expo and bare RN apps.

Dec 28, 2025
4 min read
The ultimate React Native tutorial for beginners. Learn to build beautiful cross-platform apps using a modern stack like Expo, TypeScript, and gluestack-ui.

Dec 27, 2025
4 min read
A practical guide on how to build a mobile app. Learn to go from concept to a market-ready app using templates, React Native, and proven development strategies.

Dec 26, 2025
4 min read
Discover interface design for websites with actionable tips on layout, responsiveness, and usability to boost conversions.

Dec 25, 2025
4 min read
Discover designs for apps that blend minimal aesthetics with personalization, and learn to build user-centric interfaces that boost engagement.

Dec 24, 2025
4 min read
Learn graphical interface design - essentials for mastering core principles, modern workflows, and cross-platform strategies to build intuitive, engaging UIs.

Dec 23, 2025
4 min read
Discover how high fi wireframes bridge the gap between ideas and code. Learn a practical workflow for creating, testing, and handing off effective UI designs.

Dec 22, 2025
4 min read
Discover mobile app interface design with practical principles, accessibility, and workflows that boost user engagement.

Dec 21, 2025
4 min read
Explore the top 10 UI UX design trends for 2025. Get expert insights and practical React Native tips to build next-gen cross-platform apps that stand out.

Dec 20, 2025
4 min read
Discover how mobile app templates accelerate development from idea to launch. Learn to select, customize, and deploy templates for a faster time to market.

Dec 18, 2025
4 min read
Explore the best react native ui libraries to accelerate mobile development with performance, theming, and accessibility. Expert tips inside.

Dec 16, 2025
4 min read
Master React Native PDF handling. Learn to generate, view, and share PDFs with practical code examples, library comparisons, and performance tips.

Dec 15, 2025
4 min read
A practical guide to choosing the right React Native component library. Learn how to evaluate options, avoid common pitfalls, and build apps faster.

Dec 14, 2025
4 min read
Find the perfect React Native UI library for your project. This guide compares top libraries, selection criteria, and customization strategies.

Dec 13, 2025
4 min read
Learn how to change app name in React Native and Expo. Our guide covers display names, bundle IDs, and store listings for iOS and Android projects.

Dec 12, 2025
4 min read
Discover the best React Native component library for your next project. We compare top libraries on performance, customization, and real-world use cases.

Dec 11, 2025
4 min read
Discover how to choose the right React Native UI kit. This guide covers top kits, selection criteria, and customization to accelerate your app development.

Dec 10, 2025
4 min read
Explore our in-depth guide to find the best React Native UI library. We compare top contenders to help you choose the right fit for your project.

Dec 09, 2025
4 min read
Discover a practical approach to building apps with React Native. This guide covers setup, UI, state management, and testing to help you ship great apps.

Dec 08, 2025
4 min read
android login with facebook: Learn to set up the Facebook SDK, manage tokens, and implement secure authentication across native Android, cross-platform apps.

Dec 07, 2025
4 min read
Master the alert in React Native. Learn to handle platform differences, build custom modals, and apply best practices for a seamless user experience.

Dec 06, 2025
4 min read
keyboardavoidingview react native: Master keyboard handling with KeyboardAvoidingView across iOS, Android, Expo, and TypeScript.

Dec 05, 2025
4 min read
A practical guide to implementing a React Native PDF viewer. Learn to compare libraries, handle native setup, and troubleshoot common issues with real code.

Dec 04, 2025
4 min read
how to validate startup idea: learn proven methods like customer interviews, MVPs, and metrics to confirm market fit.

Dec 03, 2025
4 min read
how to make app like uber: Learn core features, tech stack, development steps, testing, and launch tips.

Dec 02, 2025
4 min read
Build a rock-solid React Native setup. This guide covers Expo vs. Bare workflows, TypeScript, pnpm monorepos, NativeWind, and deployment strategies.

Dec 01, 2025
4 min read
A practical guide to Stripe React Native integration. Learn to set up your server, build payment UIs, handle webhooks, and launch secure mobile payments.

Nov 30, 2025
4 min read
Learn how to master push notifications in React Native. This guide covers setup, best practices, and advanced techniques for engaging your users.

Nov 29, 2025
4 min read
Build powerful location-based apps with our practical guide to react native with google maps. Get setup guides, pro tips, and best practices for iOS & Android.

Nov 28, 2025
4 min read
Explore deep linking react native with a practical guide to configuring URL schemes, universal links, navigation, and testing for Expo and bare apps.

Nov 28, 2025
4 min read
A practical guide to building a scalable React Native design system. Learn to implement tokens, theming, and tools like NativeWind and gluestack-ui.

Nov 26, 2025
4 min read
Learn why react native expo templates speed up your projects with ready-made patterns and practical tips.

Nov 25, 2025
4 min read
Discover how to improve developer productivity with actionable strategies for workflow, tooling, and culture. A practical guide for software engineering teams.

Nov 24, 2025
4 min read
Discover the best cross platform app development tools. Compare top frameworks like Flutter and React Native to build and ship apps faster.

Nov 23, 2025
4 min read
This Expo React Native tutorial provides a hands-on guide to building cross-platform apps. Learn setup, styling with NativeWind, navigation, and deployment.

Nov 22, 2025
4 min read
Build beautiful UIs faster with this guide to Tailwind CSS React Native. Learn setup, styling, and advanced techniques with NativeWind for mobile apps.

Nov 21, 2025
4 min read
Explore our curated list of 7 top-tier React Native app examples. Discover production-ready templates and resources to build your next app faster.

Mar 19, 2025
4 min read
gluestack market offers React Native UI templates to accelerate development. Get customizable, production-ready React Native app templates and Ui kit, some free. Build faster & smarter today!