Feb 05, 2026

4 min read


At its heart, the Expo vs React Native debate comes down to a simple choice of philosophy. Expo is a complete framework and toolset built on top of React Native to make your life easier, while the React Native CLI (often called the "bare workflow") gives you direct, unfiltered access to the underlying native projects.
For most new apps, the official recommendation is to start with Expo. It’s no longer just for simple projects; it’s a powerhouse that streamlines everything from setup to deployment.

Picking between Expo and the React Native CLI isn't about which one is "better." It’s about choosing the right path for your project and your team.
Think of Expo as the all-inclusive resort of mobile development. It handles the messy details—native builds, configurations, and over-the-air updates—so you can focus on building features. In contrast, the React Native CLI is like being given a plot of land and a box of tools. You get the raw ios and android project folders and the freedom to build whatever you want, but you're also responsible for all the groundwork.
Modern Expo has completely shed its old reputation as a simple prototyping tool. It now powers massive, production-grade applications for major companies, which is why the official React Native team now points developers to it as the default starting point.
The real question is one of trade-offs: Do you want a managed, hyper-efficient development experience with incredible cloud services, or do you absolutely need granular control over every single piece of the native build process from day one?
React Native's place in the mobile world is undeniable. The 2024 Stack Overflow Developer Survey pegs its market share at 35% among cross-platform frameworks. Along with Flutter, it dominates over 80% of the market, which shows just how critical tools like Expo are in making this powerful technology accessible to more developers.
Of course, this is just one part of a bigger picture. It's always worth understanding the high-level pros and cons of cross-platform frameworks versus building natively from scratch. If you're curious, this deep dive into React Native vs. native development is a great read.
To make the choice clearer, here’s a quick breakdown of how these two paths diverge right from the beginning. This table sums up the immediate, practical differences you'll feel when you start a new project.
| Decision Factor | Expo (Recommended Default) | React Native CLI (Bare Workflow) |
|---|---|---|
| Initial Setup | One command, no native SDKs required | Requires Xcode & Android Studio setup |
| Development | Fast prototyping with Expo Go; seamless | Requires native simulators/emulators |
| Native Modules | Supported via config plugins & dev clients | Manual linking and configuration required |
| Builds & Updates | Cloud-based builds & OTA updates (EAS) | Manual, local builds & certificate management |
| Web Support | First-class, integrated support | Requires manual configuration |
Ultimately, Expo provides a managed layer that handles most of the native complexity for you, while the bare workflow puts that complexity directly in your hands. We'll dig deeper into what each of these points actually means for your day-to-day development in the sections that follow.
The day-to-day grind for a developer looks wildly different depending on whether you’re in the Expo vs React Native CLI world. This choice directly shapes how fast you can build, test, and push out new features.

With Expo, you’re off to the races. You can spin up a new project and have it running on your actual phone in just a few minutes, all thanks to the Expo Go app. Just scan a QR code, and your app instantly loads. It’s a game-changer for rapid prototyping and getting a real feel for your work without ever touching native build tools.
Every change you make to your JavaScript code shows up almost instantly on your device. That tight feedback loop is a huge productivity win, especially when you're just starting and messing around with UI and logic.
Expo's managed workflow is all about hiding the messy parts of native development. You mostly stick to a simple set of commands, like npx expo start, which magically handles everything from bundling your code to getting it on the Expo Go app.
This approach comes with some killer perks:
But what if you need a specific native module? In the old days, you had to "eject," a scary, one-way process. Now, you can build a custom development client. Think of it as your own personal version of Expo Go, packed with any native dependencies you need. You get to keep the slick workflow while tapping into the full native ecosystem.
Jumping into the React Native CLI workflow—often called the "bare" workflow—is like diving headfirst into the native world. The moment you run npx react-native init, you’ll see those ios and android folders in your project. This gives you total control, but also a lot more to manage.
The core difference is directness. With the React Native CLI, you are the bridge between your JavaScript code and the native platforms. With Expo, that bridge is managed for you, letting you focus almost exclusively on your app's features.
Developing in the bare workflow means you're dealing with:
Podfile (iOS) or build.gradle (Android).npx react-native run-ios and npx react-native run-android.This workflow is non-negotiable for projects that demand deep, custom native integrations right from the start. Just be prepared for a steeper learning curve and more operational headaches. If you want to see exactly how this plays out, our detailed Expo React Native tutorial walks you through setting up a project from scratch.
Alright, let's talk about the final stretch: getting your app out into the world. This is where the rubber meets the road, and the philosophical differences between Expo and the React Native CLI become crystal clear. We're moving beyond coding and into the nitty-gritty of operations, a place where your workflow choice can either save you weeks of headache or cause it.
Frankly, this is where the Expo vs React Native debate often tilts heavily. If your team doesn't have a dedicated mobile infrastructure specialist, the gap between the two approaches is massive. One offers a fully managed, cloud-native pipeline; the other drops you in the driver's seat and asks you to build the car.
Expo Application Services (EAS) is Expo’s answer to the most painful parts of app development. It’s a suite of cloud services designed to completely sidestep the need for Xcode or Android Studio on your local machine—or a dedicated CI server—just to create a production-ready build.
It’s as simple as running a command like eas build. From there, Expo's servers take over, handling all the complex steps behind the scenes. This includes:
.ipa (for iOS) and .aab (for Android) files in a clean, consistent cloud environment. No more "it works on my machine" issues.But the killer feature, without a doubt, is Over-the-Air (OTA) updates. With EAS, you can push JavaScript and asset updates directly to your users' devices, completely bypassing the app store review process. This is a game-changer for shipping hotfixes, A/B testing new features, or just fixing a typo.
EAS fundamentally changes the deployment game. It takes a process that traditionally required deep native expertise and specialized CI/CD setups and turns it into a simple command-line operation accessible to any developer on the team.
When you go with the bare workflow, you're on your own. You have full control over the build and deployment pipeline, but this power comes at the cost of significant operational overhead. The journey usually involves setting up a dedicated build machine (a Mac is a non-negotiable for iOS builds) and wrestling a CI/CD tool like Fastlane or Jenkins into submission.
Your team is now responsible for everything:
Fastfile) to automate the build, signing, and submission process.This path demands a deep, practical understanding of each platform's specific build requirements. While the flexibility is absolute, it eats up a ton of development time that could have been spent building features your users actually care about.
Expo's rise has dramatically shortened development timelines, with some teams reporting a faster time-to-market by up to 50%. By offloading the build complexities to EAS and using OTA updates, they can sidestep the cumbersome app store review for minor changes, which massively boosts their deployment agility. You can read more about why Expo is gaining popularity among React Native developers.
When people debate Expo vs. React Native CLI, the conversation almost always lands on two core questions: "Can I use the native code I need?" and "Will my app actually be fast?" Let's cut through the noise and clear up some old myths that just won't die.
For years, a common belief was that choosing Expo meant you were locked out of the native module ecosystem. Back in the day, there was some truth to that. Your only escape hatch was to "eject," a messy, irreversible process that everyone dreaded. But that’s ancient history now. The game completely changed with the arrival of config plugins and custom development clients.
Think of a custom development client as your own personalized version of the Expo Go app. It's a special build of your app that includes any specific native library you need, whether it's for Bluetooth Low Energy, a custom video processor, or a niche hardware integration.
This approach genuinely gives you the best of both worlds. You get to integrate pretty much any native module out there for React Native while sticking with Expo's streamlined workflow, simple commands, and fantastic cloud services. The process is as simple as running a command to build the development client, which you then pop onto your simulator or phone.
Here’s a quick look at how the native integration workflows really compare:
app.json, and build a custom development client. Your day-to-day development stays fast and smooth.Podfile on iOS or build.gradle on Android to configure it by hand. It's a more direct route, but it's also way more prone to errors and assumes you know your way around native tooling.Modern Expo isn't about choosing between convenience and power anymore. Instead of ejecting, you just extend the managed environment to pull in the native features you need. Your development process stays clean.
Another stubborn myth is that an app built with Expo is somehow slower than one made with the React Native CLI. For production builds, this is just plain wrong.
Whether you start a project with npx expo prebuild or npx react-native init, both paths end up compiling your JavaScript and native code into the exact same final product: a standard iOS (.ipa) or Android (.aab) app package. The underlying native code and React Native core are identical.
Performance problems almost always come from your own application code, not the tools you used to build it. The real culprits behind a slow app are things like:
At the end of the day, your app's speed is a direct reflection of your code quality and architecture. It has nothing to do with choosing Expo's powerful workflow. A well-built Expo app will perform just as well as a well-built bare React Native app—period.
One of the biggest promises of the React Native world is a single, unified codebase for iOS, Android, and the web. That "write once, run anywhere" dream is a massive efficiency boost, but how you actually achieve it is a totally different story in an Expo vs React Native CLI setup.
Expo was built with web support in mind from day one—it’s a first-class citizen. Right out of the box, an Expo project is already set up to run in a browser with a single command. This is all thanks to react-native-web, an incredible library that translates your React Native components into standard web elements. The integration is so tight that you can often get a fully adaptive website from your mobile app's code with very little extra work.
So how does it work? With Expo, your View components become <div>s, and Text becomes a <p> or a <span>. This layer of abstraction means you can share not just your business logic but your UI components, too. It just works.
This is where universal component libraries really shine. A library like gluestack-ui, for example, gives you a set of components that look and feel consistent whether they're on a phone screen or in a desktop browser. This approach makes building a cohesive user experience way simpler because you aren't stuck writing platform-specific conditional code all the time.
Expo’s philosophy is crystal clear: web support isn't an afterthought. It's a core part of the cross-platform experience, letting teams launch mobile and web apps from the same repository at an incredible pace.
Now, let's look at a bare React Native CLI project. Web support is not included by default. While you can absolutely get it working, it's a manual, and often tricky, setup process. You'll have to roll up your sleeves and install, configure, and integrate react-native-web with a bundler like Webpack yourself.
This usually involves a few key steps:
react-dom and react-native-web to your project.webpack.config.js file from scratch to handle things like module aliasing, making sure that any imports from react-native are correctly pointed to react-native-web.index.html file and a web-specific entry point, typically index.web.js.This extra legwork really puts into perspective the convenience that Expo gives you for free. For teams that need to maximize their development speed across all platforms, Expo's built-in web capabilities are a huge win. If you want to see what this looks like in a real project, you can learn more about how to create a website app using these powerful tools.
Choosing between Expo and the React Native CLI isn't about finding a single "best" tool. It's about matching your workflow to what your project actually needs. The right path depends entirely on what you're building, your team's skillset, and how fast you need to get your app into users' hands. This decision really sets the tone for your development speed, operational headaches, and long-term maintenance.
To make this a bit more concrete, think about one of the biggest decision points: sharing code across platforms.
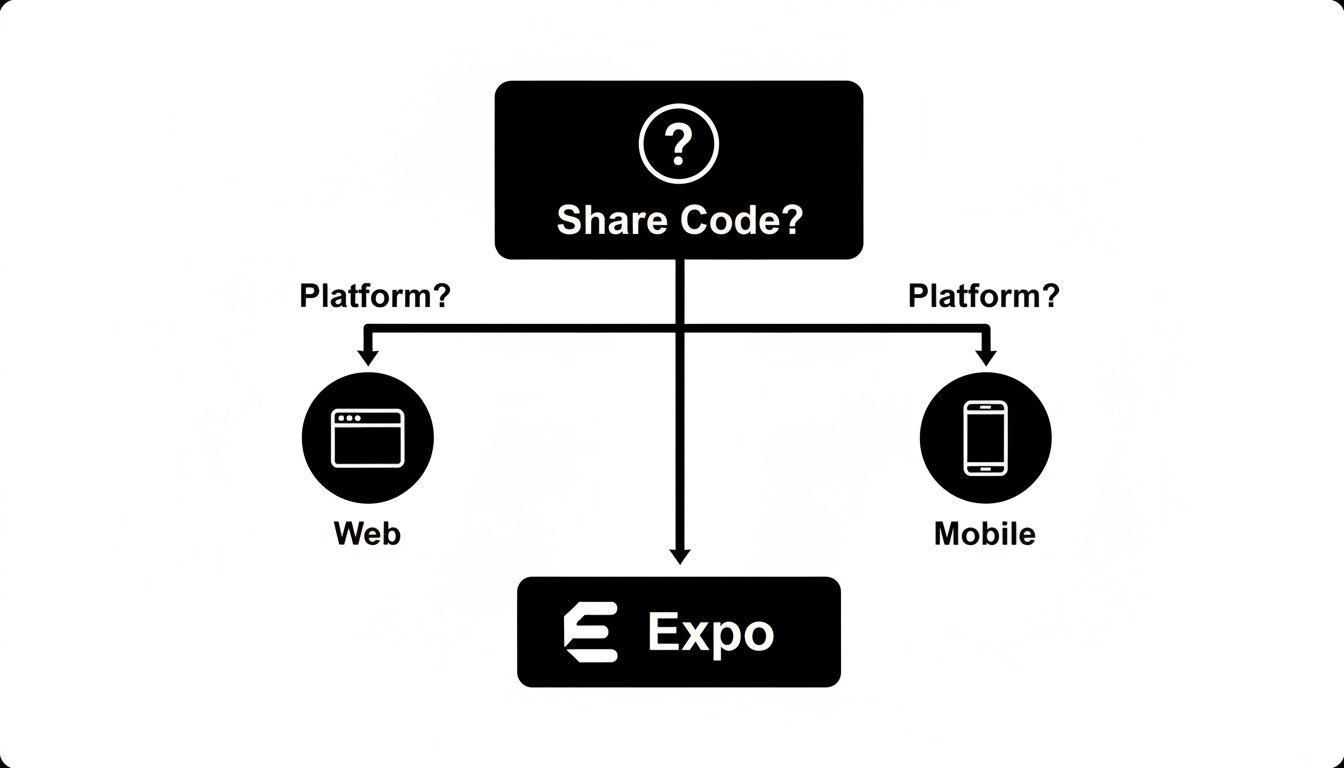
As you can see, if sharing a single codebase between mobile and web is a big win for you, Expo gives you the most direct and integrated way to get there.
Let’s move past generic pros and cons and look at real-world situations. To help you map your project to the right workflow, here's a quick decision matrix.
| Project Type / Scenario | Recommended Workflow | Key Reason |
|---|---|---|
| MVPs & Startups (Focus on Speed) | Expo (Managed) | The fastest path from idea to App Store. EAS, OTA updates, and web support let you focus on shipping features, not native build configurations. |
| Apps with Niche Hardware (e.g., Bluetooth, proprietary SDKs) | Expo (with a Custom Dev Client) | You get the smooth Expo developer experience while still being able to drop in any custom native module you need. The best of both worlds. |
| Brownfield Apps (Integrating into existing native code) | React Native CLI (Bare) | This is the classic use case for the bare workflow. You need full, granular control to embed React Native views into an established native app. |
| Complex White-Label Apps (Extensive native configurations) | React Native CLI (Bare) | When you need to programmatically alter native project files or manage complex build variants, the bare workflow provides the necessary access. |
| Most New, Complex Apps | Expo (Start Managed) | For the vast majority of projects, even complex ones, starting with Expo is the smarter bet. It's faster, more maintainable, and you can always add native code later if you hit a wall. |
The key takeaway? The modern Expo ecosystem has largely killed the old "all or nothing" dilemma. You can start with a fully managed workflow and gradually introduce native code as needed, or even bring Expo's services into an existing bare project. The migration paths are incredibly flexible now.
The React Native CLI remains the best choice for a small, specific group of projects. You should really only reach for the bare workflow if your app has deep, complex native requirements from day one that involve fundamentally changing the underlying project structure itself.
Think building a custom brownfield app that weaves React Native into an existing Swift or Kotlin codebase, or developing a white-label app that requires extensive, dynamic native configurations for each client.
For just about everything else, starting with Expo is the modern, recommended approach. It just provides a faster, more maintainable foundation to build on. For a wider perspective on this, check out our guide on other cross-platform app development tools.
When you're weighing Expo against the React Native CLI, a few questions always seem to pop up. Let's clear the air and tackle them head-on, based on how things really work today.
Absolutely. This is probably the biggest myth still floating around. With modern Expo, you can use any native module you want.
The key is creating a custom development client. Forget "ejecting"—that's old news. Instead, you build a special version of your app that bundles in the specific native libraries you need. You then use this client to develop your app, giving you total native freedom while keeping all the great parts of Expo's workflow, like the powerful EAS Build service.
Nope. This is another misconception held over from Expo's early days. A production app built with Expo is not automatically slower than a bare React Native CLI app.
At the end of the day, both paths compile down to the same native code. Your app's performance will come down to how you write your JavaScript and structure your components, not whether you started with
npx create-expo-appor the CLI.
You can, but you probably won't ever need to. The old "eject" command has been replaced by something much more flexible and less destructive.
If you ever find yourself needing direct access to the native ios and android project files, you just run npx expo prebuild. This command generates those folders for you, effectively giving you a bare-workflow setup. The best part? You can still use all of Expo’s tools and services. It’s a win-win.
Ready to ship your cross-platform app faster? gluestack market offers production-ready templates built with Expo, TypeScript, and NativeWind. Skip the setup and focus on your idea. Explore our marketplace and find your perfect starting point today!

Feb 23, 2026
4 min read
Discover powerful mobile app monetization strategies to boost your revenue. Our guide covers IAPs, ads, and subscriptions for React Native apps and beyond.

Feb 22, 2026
4 min read
A clear guide to app development cost estimation. Learn what drives costs, see budget examples, and discover strategies to build your app for less.

Feb 21, 2026
4 min read
Discover how to promote mobile application effectively with proven ASO, paid campaigns, and retention strategies.

Feb 15, 2026
4 min read
Discover how to create a prototype of a website with a practical, step-by-step guide. Explore tools, testing methods, and tips to bring your idea to life.

Feb 14, 2026
4 min read
Confused about mockups vs wireframes? Learn the key differences, when to use each, and how to streamline your React Native app development workflow.

Feb 13, 2026
4 min read
Discover how mobile apps templates accelerate development. Learn to choose, customize, and deploy high-quality React Native templates for your next project.

Feb 12, 2026
4 min read
Explore mobile application interface design with practical tips, core principles, and platform-aware workflows to craft apps users love.

Feb 10, 2026
4 min read
Learn mobile first design principles to craft fast, accessible apps that delight users. Practical tips, examples, and testing strategies.

Feb 08, 2026
4 min read
Explore the progressive web app vs native debate with our in-depth guide. We compare performance, cost, and UX to help you make the right strategic choice.

Feb 07, 2026
4 min read
Discover how React Native templates can accelerate your app development. This guide explores choosing, customizing, and deploying templates for faster launches.

Feb 03, 2026
4 min read
Master image with text overlay in React Native with responsive, accessible patterns. Learn expo setup, NativeWind styling, and gluestack-ui examples.

Feb 03, 2026
4 min read
Discover cross platform app development with proven strategies to build faster for iOS, Android, and the web using a single, unified codebase.

Feb 01, 2026
4 min read
Learn how to make an app for my business quickly with template-based steps from planning to launch, plus tips to scale and optimize.

Jan 31, 2026
4 min read
Ready to build an app? This guide shares practical strategies for validating your idea, choosing a tech stack, and navigating the App Store launch.

Jan 30, 2026
4 min read
Master responsive design for mobile apps with this guide on fluid layouts, breakpoints, and React Native. Build UIs that adapt perfectly to any screen.

Jan 25, 2026
4 min read
Learn how to design an Android app that stands out. This guide covers UX research, wireframing, Material Design, and the developer handoff process.

Jan 24, 2026
4 min read
Explore ui design web essentials: a complete guide to principles, responsive patterns, and workflows for intuitive, engaging web interfaces.

Jan 23, 2026
4 min read
Discover 10 essential mobile app design best practices for building exceptional cross-platform apps. Actionable tips for UI, UX, navigation, and performance.

Jan 21, 2026
4 min read
Discover how to debug React Native apps effectively. This guide covers Flipper, React DevTools, and native code troubleshooting for faster development cycles.

Jan 20, 2026
4 min read
Learn how to create app for your business with a practical, modern approach. Plan, customize, and launch with proven steps.

Jan 19, 2026
4 min read
A complete guide to mobile app development for startups. Learn how to validate your idea, build an MVP, and launch a successful app faster and more affordably.

Jan 18, 2026
4 min read
Discover how to choose the right React website template to accelerate your project. Our guide covers everything from quality checklists to deployment.

Jan 17, 2026
4 min read
Discover how to choose, customize, and deploy a React Native app template. This guide provides practical steps for launching production-ready apps faster.

Jan 16, 2026
4 min read
Discover how mobile application templates accelerate development. This guide covers how to choose, customize, and launch your app with the right foundation.

Jan 13, 2026
4 min read
Start your journey in mobile app development for beginners. This guide breaks down how to build your first cross-platform app with React Native and Expo.

Jan 12, 2026
4 min read
Explore the best react native ui libraries and compare features, performance, and ease of use to pick the right toolkit for your app.

Jan 11, 2026
4 min read
Launch your own ride-hailing service with our guide to building a production-ready Uber app clone. Learn MVP strategy, tech stacks, and backend integration.

Jan 10, 2026
4 min read
Master modern cash app design with this guide. Learn the UI/UX, security, and React Native strategies needed to build a fintech app that users trust and love.

Jan 09, 2026
4 min read
Learn how to build a personal finance dashboard with React Native. A practical guide for developers on UI design, data architecture, and production readiness.

Jan 08, 2026
4 min read
A practical guide to building a cross-platform event check in app with React Native. Learn to implement QR scanning, offline sync, and deployment.

Jan 07, 2026
4 min read
Master linear gradient React Native components with our complete guide. Learn practical techniques for Expo, bare RN, and NativeWind to build stunning UIs.

Jan 06, 2026
4 min read
Learn how to change application name in your React Native & Expo projects. This guide covers display names, package IDs, and app store listings.

Jan 05, 2026
4 min read
Discover how to monetize mobile apps with our founder's guide. Learn proven React Native strategies for ads, IAPs, and subscriptions to maximize your revenue.

Jan 04, 2026
4 min read
A practical guide on how to create a website app with a single codebase. Learn to build for web, iOS, and Android using React Native, Expo, and TypeScript.

Jan 03, 2026
4 min read
Learn how to create an app for your business with this definitive guide. Discover practical strategies for validation, development, and launch that work.

Jan 02, 2026
4 min read
Learn how to create a wireframe for a website with this practical guide. Move from initial sketches to developer-ready designs that get built right.

Jan 01, 2026
4 min read
Deciding on progressive web application vs native? This guide offers a deep comparison of performance, cost, UX, and use cases to help you choose wisely.

Dec 31, 2025
4 min read
Discover 10 mobile app security best practices for React Native. Learn to secure data, APIs, and code with actionable tips and examples for 2025.

Dec 30, 2025
4 min read
Unlock the real React Native app development cost. Our guide breaks down pricing by feature, team, and complexity to help you budget with confidence.

Dec 29, 2025
4 min read
A practical guide to master your React Native debug workflow. Learn to use Flipper, React DevTools, and Hermes to solve bugs in Expo and bare RN apps.

Dec 28, 2025
4 min read
The ultimate React Native tutorial for beginners. Learn to build beautiful cross-platform apps using a modern stack like Expo, TypeScript, and gluestack-ui.

Dec 27, 2025
4 min read
A practical guide on how to build a mobile app. Learn to go from concept to a market-ready app using templates, React Native, and proven development strategies.

Dec 26, 2025
4 min read
Discover interface design for websites with actionable tips on layout, responsiveness, and usability to boost conversions.

Dec 25, 2025
4 min read
Discover designs for apps that blend minimal aesthetics with personalization, and learn to build user-centric interfaces that boost engagement.

Dec 24, 2025
4 min read
Learn graphical interface design - essentials for mastering core principles, modern workflows, and cross-platform strategies to build intuitive, engaging UIs.

Dec 23, 2025
4 min read
Discover how high fi wireframes bridge the gap between ideas and code. Learn a practical workflow for creating, testing, and handing off effective UI designs.

Dec 22, 2025
4 min read
Discover mobile app interface design with practical principles, accessibility, and workflows that boost user engagement.

Dec 21, 2025
4 min read
Explore the top 10 UI UX design trends for 2025. Get expert insights and practical React Native tips to build next-gen cross-platform apps that stand out.

Dec 20, 2025
4 min read
Discover how mobile app templates accelerate development from idea to launch. Learn to select, customize, and deploy templates for a faster time to market.

Dec 18, 2025
4 min read
Explore the best react native ui libraries to accelerate mobile development with performance, theming, and accessibility. Expert tips inside.

Dec 16, 2025
4 min read
Master React Native PDF handling. Learn to generate, view, and share PDFs with practical code examples, library comparisons, and performance tips.

Dec 15, 2025
4 min read
A practical guide to choosing the right React Native component library. Learn how to evaluate options, avoid common pitfalls, and build apps faster.

Dec 14, 2025
4 min read
Find the perfect React Native UI library for your project. This guide compares top libraries, selection criteria, and customization strategies.

Dec 13, 2025
4 min read
Learn how to change app name in React Native and Expo. Our guide covers display names, bundle IDs, and store listings for iOS and Android projects.

Dec 12, 2025
4 min read
Discover the best React Native component library for your next project. We compare top libraries on performance, customization, and real-world use cases.

Dec 11, 2025
4 min read
Discover how to choose the right React Native UI kit. This guide covers top kits, selection criteria, and customization to accelerate your app development.

Dec 10, 2025
4 min read
Explore our in-depth guide to find the best React Native UI library. We compare top contenders to help you choose the right fit for your project.

Dec 09, 2025
4 min read
Discover a practical approach to building apps with React Native. This guide covers setup, UI, state management, and testing to help you ship great apps.

Dec 08, 2025
4 min read
android login with facebook: Learn to set up the Facebook SDK, manage tokens, and implement secure authentication across native Android, cross-platform apps.

Dec 07, 2025
4 min read
Master the alert in React Native. Learn to handle platform differences, build custom modals, and apply best practices for a seamless user experience.

Dec 06, 2025
4 min read
keyboardavoidingview react native: Master keyboard handling with KeyboardAvoidingView across iOS, Android, Expo, and TypeScript.

Dec 05, 2025
4 min read
A practical guide to implementing a React Native PDF viewer. Learn to compare libraries, handle native setup, and troubleshoot common issues with real code.

Dec 04, 2025
4 min read
how to validate startup idea: learn proven methods like customer interviews, MVPs, and metrics to confirm market fit.

Dec 03, 2025
4 min read
how to make app like uber: Learn core features, tech stack, development steps, testing, and launch tips.

Dec 02, 2025
4 min read
Build a rock-solid React Native setup. This guide covers Expo vs. Bare workflows, TypeScript, pnpm monorepos, NativeWind, and deployment strategies.

Dec 01, 2025
4 min read
A practical guide to Stripe React Native integration. Learn to set up your server, build payment UIs, handle webhooks, and launch secure mobile payments.

Nov 30, 2025
4 min read
Learn how to master push notifications in React Native. This guide covers setup, best practices, and advanced techniques for engaging your users.

Nov 29, 2025
4 min read
Build powerful location-based apps with our practical guide to react native with google maps. Get setup guides, pro tips, and best practices for iOS & Android.

Nov 28, 2025
4 min read
Explore deep linking react native with a practical guide to configuring URL schemes, universal links, navigation, and testing for Expo and bare apps.

Nov 28, 2025
4 min read
A practical guide to building a scalable React Native design system. Learn to implement tokens, theming, and tools like NativeWind and gluestack-ui.

Nov 26, 2025
4 min read
Learn why react native expo templates speed up your projects with ready-made patterns and practical tips.

Nov 25, 2025
4 min read
Discover how to improve developer productivity with actionable strategies for workflow, tooling, and culture. A practical guide for software engineering teams.

Nov 24, 2025
4 min read
Discover the best cross platform app development tools. Compare top frameworks like Flutter and React Native to build and ship apps faster.

Nov 23, 2025
4 min read
This Expo React Native tutorial provides a hands-on guide to building cross-platform apps. Learn setup, styling with NativeWind, navigation, and deployment.

Nov 22, 2025
4 min read
Build beautiful UIs faster with this guide to Tailwind CSS React Native. Learn setup, styling, and advanced techniques with NativeWind for mobile apps.

Nov 21, 2025
4 min read
Explore our curated list of 7 top-tier React Native app examples. Discover production-ready templates and resources to build your next app faster.

Mar 19, 2025
4 min read
gluestack market offers React Native UI templates to accelerate development. Get customizable, production-ready React Native app templates and Ui kit, some free. Build faster & smarter today!