Jan 08, 2026

4 min read

Let's be real: a clunky, manual check-in process is the fastest way to kill the vibe of an event. Long lines and fumbling with paper lists? That's a recipe for unhappy attendees before they even step inside. A powerful event check in app isn't just a nice-to-have anymore—it's the core of a smooth, professional operation.
Building one from the ground up, though, is a huge undertaking. That’s why we’re going to walk through how to build a production-ready, cross-platform app using React Native and the fantastic templates from gluestack market.

Think about it: a seamless check-in sets the tone for the entire experience. It tells attendees that the event is organized, modern, and values their time. For organizers, it's a goldmine of real-time data. This is where a dedicated mobile app truly shines.
The industry data backs this up. The event check in app has become a central piece of the event-tech world. A solid 79.3% of event professionals rely on some form of event management software, and the check-in module is almost always front and center. With in-person events making a huge comeback—accounting for around 60% of event revenue—that physical check-in experience is more critical than ever. You can dig into more of these trends over at ResearchAndMarkets.com.
Our goal here is to build something more than a basic QR scanner. We're aiming for a production-ready application—something that’s robust, scalable, and genuinely easy for event staff to use under pressure. By starting with gluestack market's React Native templates, we get a massive head start.
These templates aren't just empty shells. They come pre-loaded with a smart, modern tech stack that's perfect for cross-platform development:
This foundation lets us skip the boring, time-consuming boilerplate and jump straight into building the features that actually make a difference.
Building with a template isn’t about cutting corners; it's about starting on the third floor instead of the basement. You get architecture, UI, and best practices baked in, letting you innovate on the features that truly matter to your event.
To give you a clearer picture of what "production-ready" means in this context, here's a breakdown of the core features a professional-grade check-in app absolutely needs.
| Feature | What It Does | Why It's Critical | gluestack Template Advantage |
|---|---|---|---|
| QR/Barcode Scanning | Quickly scans tickets from a phone screen or paper. | The fastest way to process attendees and keep lines moving. | Pre-built camera integration and UI components save you days of work. |
| Real-Time & Offline Sync | Syncs check-in data with a central database instantly. Works offline when Wi-Fi is spotty. | Ensures data integrity and prevents duplicate check-ins. Crucial for venues with poor connectivity. | Templates are architected for this, often with state management hooks ready to go. |
| Secure Authentication | Role-based access for staff, admins, and volunteers. | Protects sensitive attendee data and prevents unauthorized access. | Comes with pre-configured authentication flows (e.g., Supabase, Firebase). |
| Push Notifications | Sends real-time alerts to staff (e.g., "VIP Arrived," "Check-In Paused"). | Improves communication and coordination among the event team on the ground. | Expo's push notification service is easy to integrate into the template's structure. |
| Attendee Management | Allows staff to search for attendees, view details, and manually check them in. | Solves real-world problems like forgotten tickets or name changes on the spot. | UI for lists, search bars, and detail views are already part of gluestack-ui. |
This table illustrates the power of our starting point. Instead of building these complex systems from scratch, we can focus on customizing them to fit the unique needs of our event.
We're going to build an app that would feel at home at any major conference, workshop, or festival. We’ll go beyond the basics to implement features that solve real-world headaches for event organizers and their staff.
You’ll get a deep dive into the thinking behind the gluestack templates and see how they elegantly handle common development challenges right out of the box. Consider this section our mission statement. We have a clear vision for the final product and a strategic advantage by starting with a foundation that’s already been battle-tested.
Let’s get to it.
Alright, let’s get our hands dirty. Before we can dive into the fun stuff like QR code scanning and real-time data sync, we need to lay a solid foundation. A clean, well-organized development environment is the difference between a smooth project and one filled with frustrating, late-night debugging sessions. Trust me, getting this right from the start saves a ton of headaches later.
The great thing is, the modern React Native world, especially with Expo in the mix, makes this part pretty painless. We’ll need the usual suspects: Node.js, the Expo CLI, and Git. These are the absolute must-haves for any serious cross-platform app. If you need a hand getting those installed, our detailed guide on React Native setup has you covered.
With the basics out of the way, we can really pick up the pace.
Instead of starting from a blank slate with npx create-expo-app, we're going to grab a production-ready template straight from gluestack market. This is a massive shortcut. These aren't just empty folders; they're fully architected starters with navigation, state management, and a whole suite of UI components already wired up.
Head over to gluestack market, pick out a template that feels right for an event app, and download it. From there, it's just a few simple commands:
cd into the new project folder, and run npm install (or yarn install). This command is the magic that pulls down all the project's dependencies—React Native, Expo, gluestack-ui, and everything else.npm start (or yarn start). This boots up the Expo development server and shows you a QR code right in your terminal.Now for the fun part. You can scan that QR code with the Expo Go app on your phone (iOS or Android) to see it on a real device. Or, in the terminal, just press i for the iOS Simulator, a for an Android Emulator, or w to see it in your web browser. Getting the app running on all three platforms is our first big win.
Once you open the project in your code editor, you'll notice how clean and logical the file structure is. While there might be small differences between templates, they generally follow a scalable pattern that just makes sense.
src/: This is your home base. All the code that makes your app unique will live in here.src/screens/: Each file here is a distinct screen in your app. Think LoginScreen.tsx or AttendeeListScreen.tsx.src/components/: This is for your reusable building blocks—things like a CustomButton.tsx, a SearchBar.tsx, or a StatusBadge.tsx that you'll use all over the app.gluestack-ui.config.ts: This is your command center for styling. Want to change the colors to match your event's branding? Tweak the fonts? This is the place to do it.Take a few minutes to click around these folders. Seriously. Getting a feel for the layout now will make you so much faster when you start adding new features. This organization is one of the biggest perks of not starting from scratch.
With our environment up and the template humming along, we have a stable, cross-platform foundation ready to go. Now, we're perfectly set up to build the core features that will make our event check-in app a real powerhouse.
Alright, with your development environment set up and ready to go, it's time to dive into the core of the app—the actual check-in functionality. This is where we build the features that event staff will rely on to get attendees in the door smoothly. We'll be tackling QR scanning, attendee list management, and making sure the app is tough enough to handle the chaos of a live event, including spotty Wi-Fi.
Getting this first phase of development right is crucial. Just like setting up your dev environment, following a clear sequence here will save you a world of headaches later on.
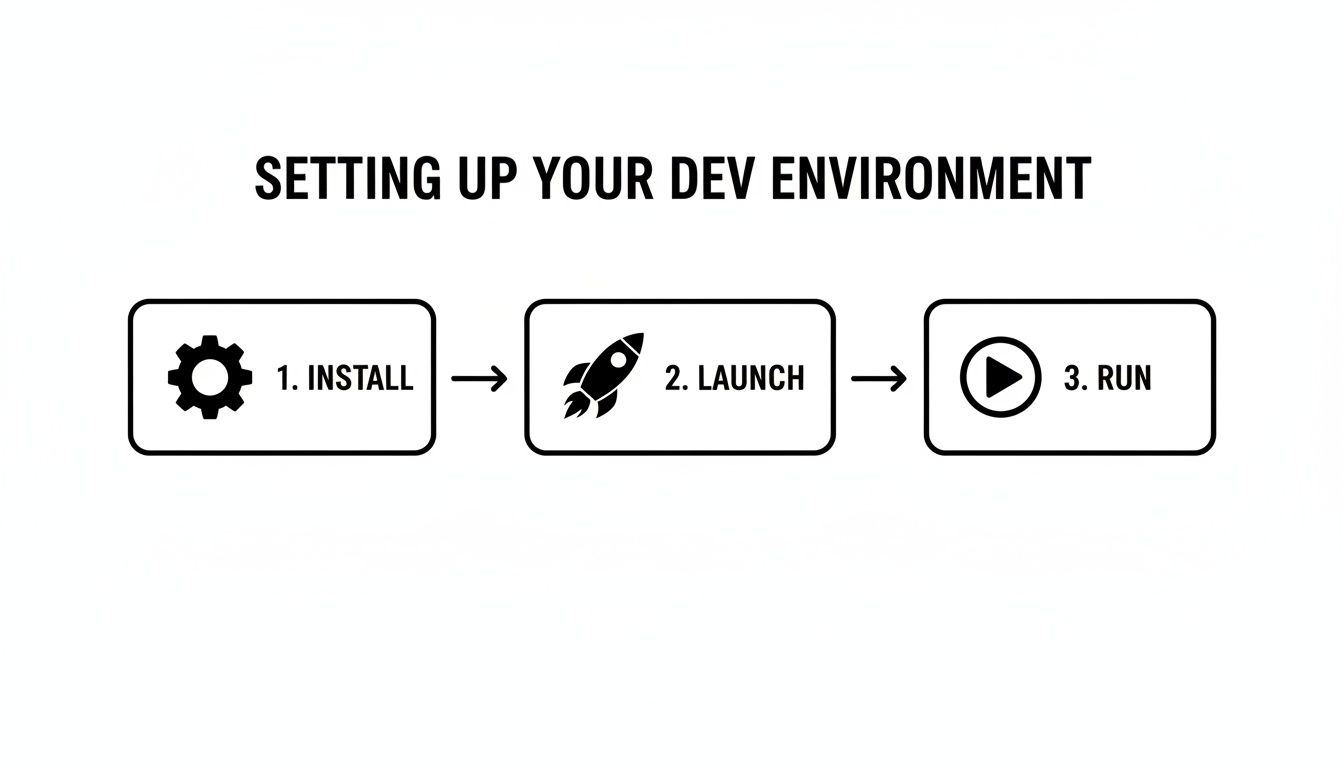
This simple progression—install, launch, run—is the foundation we'll build our core features on top of.
Speed is everything at the check-in desk, and nothing beats the quick scan of a QR code. For a React Native app built with Expo, the expo-camera and expo-barcode-scanner libraries are absolute lifesavers. They give you a clean, high-level API that handles all the gnarly bits of accessing the native camera on both iOS and Android.
First things first: you have to request camera permissions. This is a non-negotiable step for both user privacy and getting the app to work at all. Once you have the green light, you can render the Camera component from expo-camera to get a live feed. The magic happens with the onBarCodeScanned prop; just point it to a callback function that will fire the instant a valid code enters the camera's view.
From there, your app's logic takes over. The data you get from the scan—usually a unique attendee ID or ticket number—is what you'll use to hit your attendee list, confirm the ticket is valid, and update the UI to let the staff know what's happening.
The scanner is only half the equation. It needs a comprehensive attendee list to check against. This means your app needs a solid way to fetch, display, search, and update this data, which you'll probably want to house in a dedicated AttendeeListScreen.
Here's how I'd approach building it out:
useState hook or, for more complex apps, reach for something like Zustand or Redux Toolkit.FlatList is your best friend. This component virtualizes the list, only rendering the items currently on screen. It’s a massive performance win that prevents memory clogs and keeps the UI feeling snappy.Input component. To keep things smooth, you can filter the list as the user types. A pro tip for really long lists is to debounce the input—this means your filtering logic only runs after the user pauses for a few milliseconds (say, 300ms), preventing the app from chugging on every keystroke.Using pre-built components from gluestack-ui really speeds this process up. If you're curious about other toolkits, it's worth taking a look at the landscape of available React Native UI libraries.
When a ticket is scanned, the event staff needs instant, crystal-clear feedback. Was it a success? A duplicate? An invalid ticket? This all comes down to solid state management within your component.
I find it helpful to manage this with a simple state variable that can hold values like 'idle', 'scanning', 'success', 'error', or 'duplicate'.
Your app's state isn't just for data; it's for communication. A successful scan should trigger a vibrant green overlay with the attendee's name, while an error should show a clear, concise red message explaining the problem. This instant visual feedback is what makes the app truly usable in a noisy, fast-paced event environment.
This state-driven approach lets you conditionally render different gluestack-ui components. A successful scan might pop up a Modal with attendee details, while an error could trigger a Toast notification that doesn't interrupt the flow.
Let’s be real: event Wi-Fi is notoriously bad. A professional event check-in app absolutely must work whether it's online or offline. This is probably the trickiest part of the whole build, but it's what separates a demo from a production-ready tool.
The best strategy is a hybrid one:
This architecture is bulletproof. If the venue's internet dies, your staff can keep the lines moving without a single hiccup. Once connectivity returns, the app quietly syncs everything up in the background, ensuring your data is always accurate. It’s this kind of resilience that turns a potential disaster into a non-issue.
Let's be honest, a slick UI and a snappy QR scanner are great, but they're just the beginning. Your event check in app is only as good as its connection to a central source of truth—the backend.
This is the brain of the whole operation. It holds the master attendee list, manages who can do what, and logs every single check-in. Nailing this connection is what turns a cool demo into a reliable, professional tool that event organizers can actually count on.
It’s this integration that makes the magic happen. When a volunteer scans a ticket at the front door, the backend ensures a colleague at the VIP entrance sees that update in real-time. It's also what stands between sensitive attendee data and unauthorized access.
One of the best parts of building with a modern stack like React Native is the freedom you have. You're not boxed into one specific backend technology. Whether you want the speed of a Backend-as-a-Service (BaaS) platform or the total control of a custom API, the integration pattern feels pretty similar.
Here are a few paths developers commonly take:
When it comes to building out robust user management, it's worth exploring different authentication services to see what fits best. The real trick is to create a clean, reusable API service layer in your React Native app. This layer will handle all your fetch or Axios calls, keeping your component code tidy and much easier to work with down the road.
Remember, this event check in app isn't for the attendees—it's for your crew. That means you need a rock-solid way for staff, volunteers, and admins to log in. The gluestack market templates give you a massive head start, often shipping with pre-built authentication screens. Your job is to wire them up to your backend.
This usually starts with defining user roles. You might have an 'Admin' who can view analytics and manage other users, and a 'Volunteer' who can only scan tickets. When someone logs in, your authentication service should send back a JSON Web Token (JWT) that contains their role and permissions.
Storing this JWT securely is absolutely non-negotiable. Use a dedicated secure storage solution like Expo's
expo-secure-storeto save the token on the device. Whatever you do, never put sensitive credentials inAsyncStorage, as it's not encrypted and can be easily read.
Once that token is safely stored, you'll include it in the header of every subsequent API request. This proves to the backend who the user is and what they're allowed to do. For a much deeper dive, our guide on mobile app security best practices is packed with essential strategies for protecting user data.
Push notifications can elevate your app from a simple check-in tool to a dynamic communication hub for the entire event team. Instead of fumbling with walkie-talkies or noisy group chats, you can send automated, targeted alerts for critical moments.
Just think about the possibilities:
This is surprisingly easy to set up with a service like Firebase Cloud Messaging (FCM) or Expo's push notification service. On your backend, you can create a specific endpoint that, when called, triggers a notification to a single user or a whole group. This simple feature adds a ton of operational value, making the on-site team feel far more connected and efficient.
 A functional check-in app gets the job done, but a branded one feels like it truly belongs to your event. Think of the gluestack market template not as a final product, but as a powerful, flexible launchpad. Now, let’s go beyond the defaults and really make this app your own.
This is about more than just swapping out a logo. We'll dig into tweaking the gluestack-ui theme to match your event's vibe, but we'll also look at bigger architectural shifts that open up some serious, enterprise-level features. The goal is to evolve the template from a simple utility into a sophisticated tool that can handle the messy reality of complex event logistics.
The first thing anyone will notice is the branding. Luckily, gluestack-ui was built from the ground up for this kind of deep customization, letting you control every color, font, and spacing element from a single, central configuration file.
Instead of chasing down styles in individual components, you define your brand's aesthetic once. This locks in consistency across every screen, from the login page to the attendee list. It’s a clean and incredibly efficient way to inject your event’s personality right into the app.
Here’s a practical approach:
gluestack-ui.config.ts file. This is your command center for overriding default colors, fonts, and component styles to line up with your brand guide.primary and secondary button styles that perfectly match your event's color palette.Your brand isn’t just a logo. It’s the entire user experience. A thoughtfully themed app that uses consistent colors, typography, and iconography feels more reliable and professional to the event staff who depend on it.
Most organizations don't just run one event. A truly valuable app shouldn't be a one-and-done tool; it needs to be adaptable. Reworking the template's architecture to handle multiple events is a game-changing extension that delivers immense long-term value.
This means you'll need to rethink the data model. Instead of just fetching a single attendee list, the app will first need to select an event and then pull the data tied to it. This shift ripples through the entire application, affecting everything from the first screen to how data is cached locally for offline mode. It’s a significant architectural lift, but it’s what makes your app infinitely more powerful.
Check-in is one of the richest data sources you have during an event. Building an analytics dashboard right into the app gives organizers a real-time command center to monitor what's happening on the ground.
This check-in data is pure gold. Research shows that good event management software can improve forecast accuracy by 18% and slash operational downtime by about 30%, mostly because organizers can see arrival patterns and queue lengths as they happen. According to research on event management software from Technavio, this data can even power things like AI-driven session recommendations for attendees just minutes after they arrive.
Here are a few key metrics your dashboard could track:
A dashboard like this gives event managers the intel they need to make smart, on-the-fly decisions.
For many professional conferences and trade shows, a physical badge is non-negotiable. Extending your app to connect with on-site printers is an advanced feature that massively upgrades the attendee experience. It also cuts out the wasteful and expensive process of pre-printing badges for people who never show up.
The workflow is beautifully simple: once an attendee's QR code is scanned and they're checked in, the app fires off a command to a networked printer to instantly produce their badge. This guarantees every badge is accurate and handed to the right person, creating a smooth, impressive welcome for every single guest. It’s that final touch that cements the app as an indispensable part of your event operations.
Before your check-in app faces a real-world crowd, you need to put it through its paces. This final push from development to deployment is where you make sure the app isn't just functional, but fast, reliable, and genuinely usable for the entire event staff. A laggy app during the morning rush is a recipe for long lines and frustrated attendees.
When it comes to React Native, performance often boils down to how you handle large lists and re-renders. Imagine scrolling through an attendee list with thousands of names. A basic map function would try to render every single entry at once, instantly freezing the UI.
This is exactly why FlatList is non-negotiable. It virtualizes the list, only rendering the items currently on the screen. This simple change keeps memory usage down and makes scrolling buttery smooth. In the same vein, memoizing components with React.memo is a small tweak with a huge payoff—it stops components from re-rendering if their props haven't changed.
Beyond component-level fixes, you have to plan for the inevitable user surge during peak check-in hours. Your backend needs to be stress-tested to handle hundreds of simultaneous API calls without breaking a sweat. To really dig into this, it’s worth exploring topics like Boosting Application Performance: A Deep Dive into Load Performance Testing. Getting ahead of bottlenecks here will save you a world of hurt on event day.
Accessibility isn't just a nice-to-have; it's a core requirement for any professional software. A well-built app has to be usable by staff with varying abilities, and gluestack-ui's commitment to accessibility gives you a massive head start.
Make sure every button and interactive element has a clear label for screen readers. Check that your color contrast meets WCAG standards. This isn't just about inclusivity; it often leads to a cleaner, more intuitive design that benefits everyone.
With testing wrapped up, it's time to deploy. For modern React Native apps, Expo Application Services (EAS) Build is the way to go. It takes the pain out of creating your binaries by handling the entire build process in the cloud for both iOS and Android.
Before you hit "submit," run through a final checklist:
eas build command to create your .apk (Android) and .ipa (iOS) files.Nailing this final step ensures your robust, high-performance event check-in app gets into the hands of your team, ready for a flawless event day.
When you're in the trenches building a React Native event check-in app, you'll quickly find yourself bumping up against the same core challenges that every other developer faces. Let's talk through a couple of the big ones.
A question I see all the time is about picking the right backend. It's a classic showdown: Firebase versus Supabase. Firebase is fantastic for its real-time data sync, which is perfect for pushing live attendee updates to all your staff devices simultaneously. On the other hand, Supabase offers a robust PostgreSQL foundation that just feels like home if you come from a traditional relational database background. There’s no single right answer; it really depends on what your team knows and what the app needs most.
Another huge hurdle is making the app work reliably when the Wi-Fi inevitably goes down. A packed conference hall is basically a Faraday cage. The secret here is to build with an offline-first architecture from day one.
Use a local on-device database like WatermelonDB to store the entire attendee list and log every single check-in locally first. This makes the app feel incredibly fast and responsive, regardless of internet connectivity. Once a connection is re-established, a background service can kick in and sync all those queued-up check-ins with your central server. No dropped scans, no lost data.
Okay, let's talk security and operations. You need to give your volunteers a way to scan tickets, but you definitely don't want them poking around in sensitive analytics or event settings. So, how do you manage that?
The proven solution is a role-based access control (RBAC) system. It's not as complicated as it sounds. You just define a few clear roles on your backend:
The trick is to embed the user's role directly into their authentication token (like a JWT) when they log in. Your React Native app can then read this role and conditionally render screens and features. This is how you ensure staff only see and do what they’re supposed to.
Ready to skip the boilerplate and launch your app faster? gluestack market offers production-ready React Native templates built with Expo, TypeScript, and gluestack-ui to give you an unbeatable head start. Find your perfect template at https://market.gluestack.io.

Feb 23, 2026
4 min read
Discover powerful mobile app monetization strategies to boost your revenue. Our guide covers IAPs, ads, and subscriptions for React Native apps and beyond.

Feb 22, 2026
4 min read
A clear guide to app development cost estimation. Learn what drives costs, see budget examples, and discover strategies to build your app for less.

Feb 21, 2026
4 min read
Discover how to promote mobile application effectively with proven ASO, paid campaigns, and retention strategies.

Feb 15, 2026
4 min read
Discover how to create a prototype of a website with a practical, step-by-step guide. Explore tools, testing methods, and tips to bring your idea to life.

Feb 14, 2026
4 min read
Confused about mockups vs wireframes? Learn the key differences, when to use each, and how to streamline your React Native app development workflow.

Feb 13, 2026
4 min read
Discover how mobile apps templates accelerate development. Learn to choose, customize, and deploy high-quality React Native templates for your next project.

Feb 12, 2026
4 min read
Explore mobile application interface design with practical tips, core principles, and platform-aware workflows to craft apps users love.

Feb 10, 2026
4 min read
Learn mobile first design principles to craft fast, accessible apps that delight users. Practical tips, examples, and testing strategies.

Feb 08, 2026
4 min read
Explore the progressive web app vs native debate with our in-depth guide. We compare performance, cost, and UX to help you make the right strategic choice.

Feb 07, 2026
4 min read
Discover how React Native templates can accelerate your app development. This guide explores choosing, customizing, and deploying templates for faster launches.

Feb 05, 2026
4 min read
Discover the key differences between expo vs react native, including workflow, builds, and performance to help you pick the right path for your app.

Feb 03, 2026
4 min read
Master image with text overlay in React Native with responsive, accessible patterns. Learn expo setup, NativeWind styling, and gluestack-ui examples.

Feb 03, 2026
4 min read
Discover cross platform app development with proven strategies to build faster for iOS, Android, and the web using a single, unified codebase.

Feb 01, 2026
4 min read
Learn how to make an app for my business quickly with template-based steps from planning to launch, plus tips to scale and optimize.

Jan 31, 2026
4 min read
Ready to build an app? This guide shares practical strategies for validating your idea, choosing a tech stack, and navigating the App Store launch.

Jan 30, 2026
4 min read
Master responsive design for mobile apps with this guide on fluid layouts, breakpoints, and React Native. Build UIs that adapt perfectly to any screen.

Jan 25, 2026
4 min read
Learn how to design an Android app that stands out. This guide covers UX research, wireframing, Material Design, and the developer handoff process.

Jan 24, 2026
4 min read
Explore ui design web essentials: a complete guide to principles, responsive patterns, and workflows for intuitive, engaging web interfaces.

Jan 23, 2026
4 min read
Discover 10 essential mobile app design best practices for building exceptional cross-platform apps. Actionable tips for UI, UX, navigation, and performance.

Jan 21, 2026
4 min read
Discover how to debug React Native apps effectively. This guide covers Flipper, React DevTools, and native code troubleshooting for faster development cycles.

Jan 20, 2026
4 min read
Learn how to create app for your business with a practical, modern approach. Plan, customize, and launch with proven steps.

Jan 19, 2026
4 min read
A complete guide to mobile app development for startups. Learn how to validate your idea, build an MVP, and launch a successful app faster and more affordably.

Jan 18, 2026
4 min read
Discover how to choose the right React website template to accelerate your project. Our guide covers everything from quality checklists to deployment.

Jan 17, 2026
4 min read
Discover how to choose, customize, and deploy a React Native app template. This guide provides practical steps for launching production-ready apps faster.

Jan 16, 2026
4 min read
Discover how mobile application templates accelerate development. This guide covers how to choose, customize, and launch your app with the right foundation.

Jan 13, 2026
4 min read
Start your journey in mobile app development for beginners. This guide breaks down how to build your first cross-platform app with React Native and Expo.

Jan 12, 2026
4 min read
Explore the best react native ui libraries and compare features, performance, and ease of use to pick the right toolkit for your app.

Jan 11, 2026
4 min read
Launch your own ride-hailing service with our guide to building a production-ready Uber app clone. Learn MVP strategy, tech stacks, and backend integration.

Jan 10, 2026
4 min read
Master modern cash app design with this guide. Learn the UI/UX, security, and React Native strategies needed to build a fintech app that users trust and love.

Jan 09, 2026
4 min read
Learn how to build a personal finance dashboard with React Native. A practical guide for developers on UI design, data architecture, and production readiness.

Jan 07, 2026
4 min read
Master linear gradient React Native components with our complete guide. Learn practical techniques for Expo, bare RN, and NativeWind to build stunning UIs.

Jan 06, 2026
4 min read
Learn how to change application name in your React Native & Expo projects. This guide covers display names, package IDs, and app store listings.

Jan 05, 2026
4 min read
Discover how to monetize mobile apps with our founder's guide. Learn proven React Native strategies for ads, IAPs, and subscriptions to maximize your revenue.

Jan 04, 2026
4 min read
A practical guide on how to create a website app with a single codebase. Learn to build for web, iOS, and Android using React Native, Expo, and TypeScript.

Jan 03, 2026
4 min read
Learn how to create an app for your business with this definitive guide. Discover practical strategies for validation, development, and launch that work.

Jan 02, 2026
4 min read
Learn how to create a wireframe for a website with this practical guide. Move from initial sketches to developer-ready designs that get built right.

Jan 01, 2026
4 min read
Deciding on progressive web application vs native? This guide offers a deep comparison of performance, cost, UX, and use cases to help you choose wisely.

Dec 31, 2025
4 min read
Discover 10 mobile app security best practices for React Native. Learn to secure data, APIs, and code with actionable tips and examples for 2025.

Dec 30, 2025
4 min read
Unlock the real React Native app development cost. Our guide breaks down pricing by feature, team, and complexity to help you budget with confidence.

Dec 29, 2025
4 min read
A practical guide to master your React Native debug workflow. Learn to use Flipper, React DevTools, and Hermes to solve bugs in Expo and bare RN apps.

Dec 28, 2025
4 min read
The ultimate React Native tutorial for beginners. Learn to build beautiful cross-platform apps using a modern stack like Expo, TypeScript, and gluestack-ui.

Dec 27, 2025
4 min read
A practical guide on how to build a mobile app. Learn to go from concept to a market-ready app using templates, React Native, and proven development strategies.

Dec 26, 2025
4 min read
Discover interface design for websites with actionable tips on layout, responsiveness, and usability to boost conversions.

Dec 25, 2025
4 min read
Discover designs for apps that blend minimal aesthetics with personalization, and learn to build user-centric interfaces that boost engagement.

Dec 24, 2025
4 min read
Learn graphical interface design - essentials for mastering core principles, modern workflows, and cross-platform strategies to build intuitive, engaging UIs.

Dec 23, 2025
4 min read
Discover how high fi wireframes bridge the gap between ideas and code. Learn a practical workflow for creating, testing, and handing off effective UI designs.

Dec 22, 2025
4 min read
Discover mobile app interface design with practical principles, accessibility, and workflows that boost user engagement.

Dec 21, 2025
4 min read
Explore the top 10 UI UX design trends for 2025. Get expert insights and practical React Native tips to build next-gen cross-platform apps that stand out.

Dec 20, 2025
4 min read
Discover how mobile app templates accelerate development from idea to launch. Learn to select, customize, and deploy templates for a faster time to market.

Dec 18, 2025
4 min read
Explore the best react native ui libraries to accelerate mobile development with performance, theming, and accessibility. Expert tips inside.

Dec 16, 2025
4 min read
Master React Native PDF handling. Learn to generate, view, and share PDFs with practical code examples, library comparisons, and performance tips.

Dec 15, 2025
4 min read
A practical guide to choosing the right React Native component library. Learn how to evaluate options, avoid common pitfalls, and build apps faster.

Dec 14, 2025
4 min read
Find the perfect React Native UI library for your project. This guide compares top libraries, selection criteria, and customization strategies.

Dec 13, 2025
4 min read
Learn how to change app name in React Native and Expo. Our guide covers display names, bundle IDs, and store listings for iOS and Android projects.

Dec 12, 2025
4 min read
Discover the best React Native component library for your next project. We compare top libraries on performance, customization, and real-world use cases.

Dec 11, 2025
4 min read
Discover how to choose the right React Native UI kit. This guide covers top kits, selection criteria, and customization to accelerate your app development.

Dec 10, 2025
4 min read
Explore our in-depth guide to find the best React Native UI library. We compare top contenders to help you choose the right fit for your project.

Dec 09, 2025
4 min read
Discover a practical approach to building apps with React Native. This guide covers setup, UI, state management, and testing to help you ship great apps.

Dec 08, 2025
4 min read
android login with facebook: Learn to set up the Facebook SDK, manage tokens, and implement secure authentication across native Android, cross-platform apps.

Dec 07, 2025
4 min read
Master the alert in React Native. Learn to handle platform differences, build custom modals, and apply best practices for a seamless user experience.

Dec 06, 2025
4 min read
keyboardavoidingview react native: Master keyboard handling with KeyboardAvoidingView across iOS, Android, Expo, and TypeScript.

Dec 05, 2025
4 min read
A practical guide to implementing a React Native PDF viewer. Learn to compare libraries, handle native setup, and troubleshoot common issues with real code.

Dec 04, 2025
4 min read
how to validate startup idea: learn proven methods like customer interviews, MVPs, and metrics to confirm market fit.

Dec 03, 2025
4 min read
how to make app like uber: Learn core features, tech stack, development steps, testing, and launch tips.

Dec 02, 2025
4 min read
Build a rock-solid React Native setup. This guide covers Expo vs. Bare workflows, TypeScript, pnpm monorepos, NativeWind, and deployment strategies.

Dec 01, 2025
4 min read
A practical guide to Stripe React Native integration. Learn to set up your server, build payment UIs, handle webhooks, and launch secure mobile payments.

Nov 30, 2025
4 min read
Learn how to master push notifications in React Native. This guide covers setup, best practices, and advanced techniques for engaging your users.

Nov 29, 2025
4 min read
Build powerful location-based apps with our practical guide to react native with google maps. Get setup guides, pro tips, and best practices for iOS & Android.

Nov 28, 2025
4 min read
Explore deep linking react native with a practical guide to configuring URL schemes, universal links, navigation, and testing for Expo and bare apps.

Nov 28, 2025
4 min read
A practical guide to building a scalable React Native design system. Learn to implement tokens, theming, and tools like NativeWind and gluestack-ui.

Nov 26, 2025
4 min read
Learn why react native expo templates speed up your projects with ready-made patterns and practical tips.

Nov 25, 2025
4 min read
Discover how to improve developer productivity with actionable strategies for workflow, tooling, and culture. A practical guide for software engineering teams.

Nov 24, 2025
4 min read
Discover the best cross platform app development tools. Compare top frameworks like Flutter and React Native to build and ship apps faster.

Nov 23, 2025
4 min read
This Expo React Native tutorial provides a hands-on guide to building cross-platform apps. Learn setup, styling with NativeWind, navigation, and deployment.

Nov 22, 2025
4 min read
Build beautiful UIs faster with this guide to Tailwind CSS React Native. Learn setup, styling, and advanced techniques with NativeWind for mobile apps.

Nov 21, 2025
4 min read
Explore our curated list of 7 top-tier React Native app examples. Discover production-ready templates and resources to build your next app faster.

Mar 19, 2025
4 min read
gluestack market offers React Native UI templates to accelerate development. Get customizable, production-ready React Native app templates and Ui kit, some free. Build faster & smarter today!